Add a custom model to antigravity
Prerequisites: the standalone Antigravity desktop app, Git, Node.js 22.13 or newer, and a provider API key or local server.
Install
The full sequence, step by step
From clone to first message — check first, patch second.
Check
Clone, build, then run node scripts/deploy.mjs --check. Close Antigravity and its language server first. The check verifies compatibility without changing anything.
Patch
node scripts/deploy.mjs applies the patch. The installer preserves your installation, keeps version-specific backups, and rolls back failed deployments.
Add model
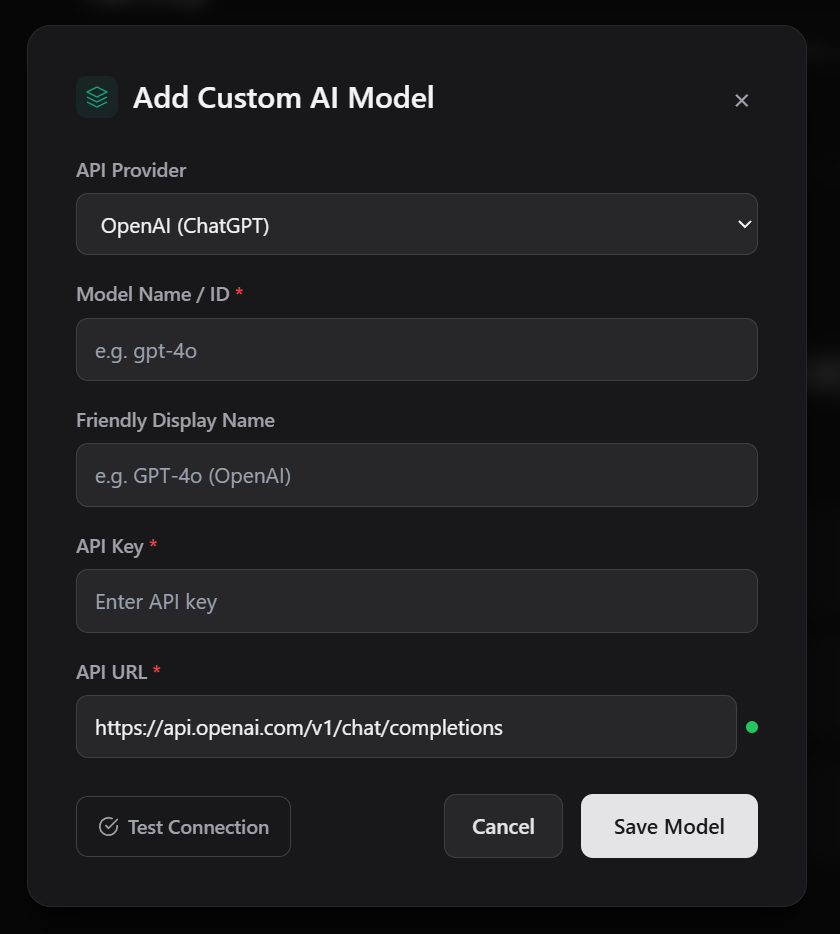
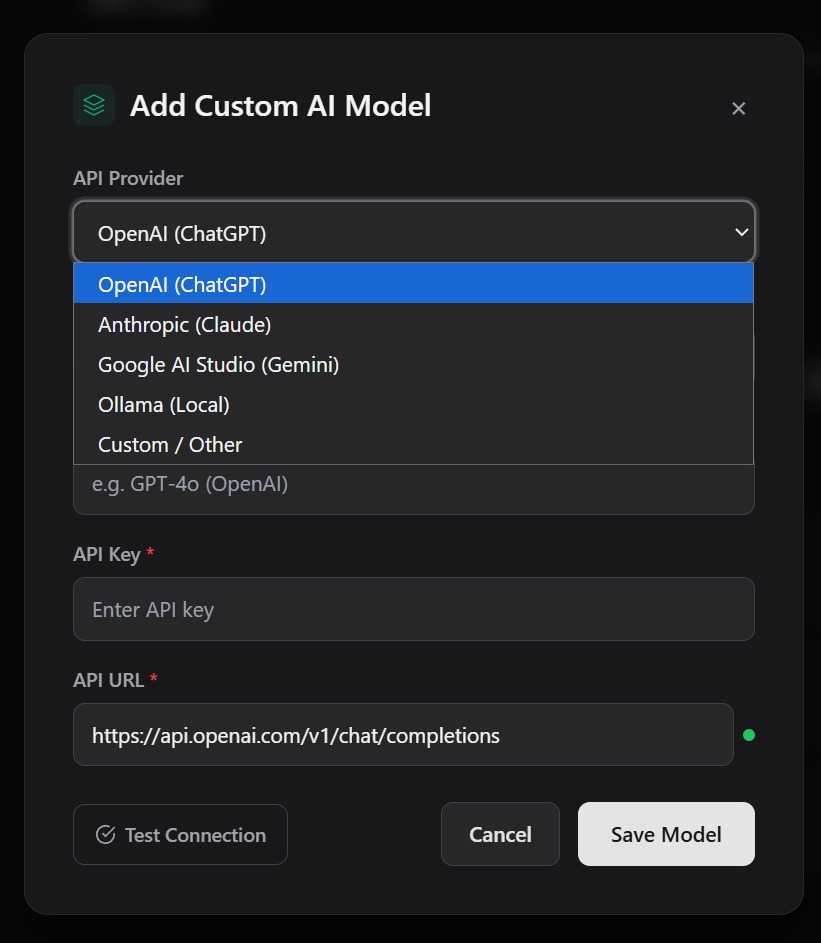
Settings → Models & Usage → Custom Models → Add model. Pick a provider preset, enter your API URL and API key, then add the model by exact ID or fetch the provider catalog.
Use it
Select your model from the chat picker. Start chatting.
Commands
Run these, in order
Verbatim from the repo README. Close Antigravity and its language server before the patch step, and run the deploy commands from the repository directory.
git clone https://github.com/vahapogut/antigravity-add-model.git cd antigravity-add-model npm ci --ignore-scripts npm run build node scripts/deploy.mjs --checkverify compatibility — no changes node scripts/deploy.mjsapply the patchAdd your model
Where the model gets configured
The two screens behind step 03 — the Add model dialog and its provider dropdown.
What do I need before starting?
The standalone Antigravity desktop app, Git, and Node.js 22.13 or newer — that Node version covers both the desktop addon and the optional gateway. You also need a provider API key or a local server to connect to.
Source: GitHub repo